PC is the place to be these days—even Sony publishes its games on Steam and has made the PlayStation 5 Dualsense controller nicely compatible with PC. Nintendo is the lone contender for PC entertainment, with its games still exclusive to the Switch and no official PC support for the Switch Pro Controller. But who needs official support? We want to use the Switch Pro Controller on PC, so we’re going to make it happen.
The Switch Pro Controller is one of my all-time favorites—it feels great in the hand, has a nice weight, and crushes the competition when it comes to battery life. The button layout is also so similar to the Xbox controller that it is easy to use in PC games without getting confused. And it’s much better than a pair of joy-cons.
For using the Switch Pro Controller on PC, my main solution is to connect via Steam: it’s extremely easy and removes any complicated setup. If you mainly want a controller for playing Steam games, using the Switch Pro Controller is practically as plug-and-play on a PC as using an Xbox pad.
But if you want to play non-Steam games, you’ll need the instructions in the rest of this guide, which talk about how to get Windows to recognize your inputs using third-party tools.
Here’s a step-by-step guide on how to get your Nintendo Switch Pro controller working on PC via Bluetooth or wired USB.
Switch Pro controller on PC: Steam setup
How to use the Switch Pro Controller in Steam
Steam’s built-in controller configurator recognizes the Nintendo controller as soon as you plug it in, making it extremely easy to use the controller in Steam games. Enabling is very simple. Start by *deep breath* plugging the controller into your computer. You got this!
1. Open Steam and the settings menu. Find the Controller tab and open “General Controller Settings”. You should see several configuration support options on the left. Turn on “Switch Configuration Support”.
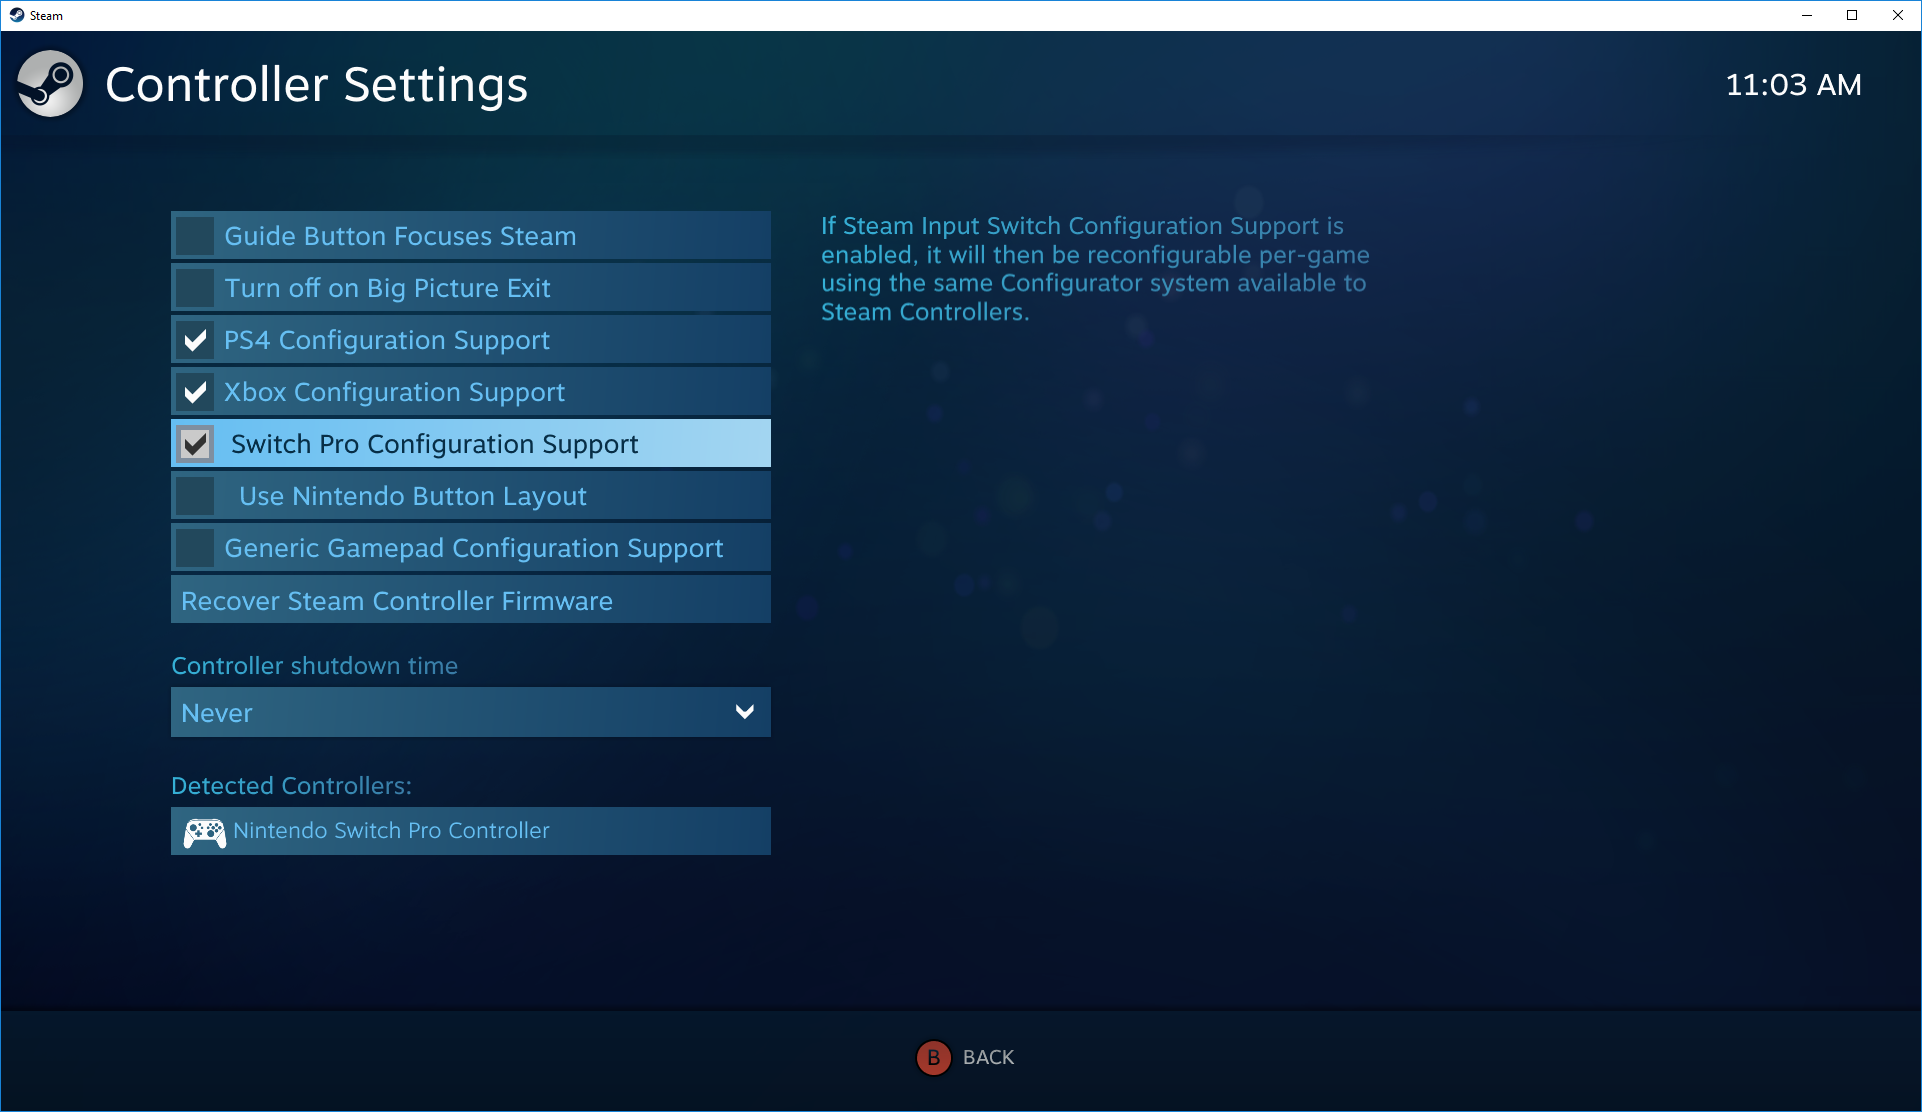
2. If you like your Pro controller with X/Y and A/B switchable buttons, you can also enable Nintendo’s button layout to make games default (Microsoft had to reverse them on their controller for some reason, and it’s still confusing ). If this option is not enabled, your Pro controller will be treated as an Xbox controller.
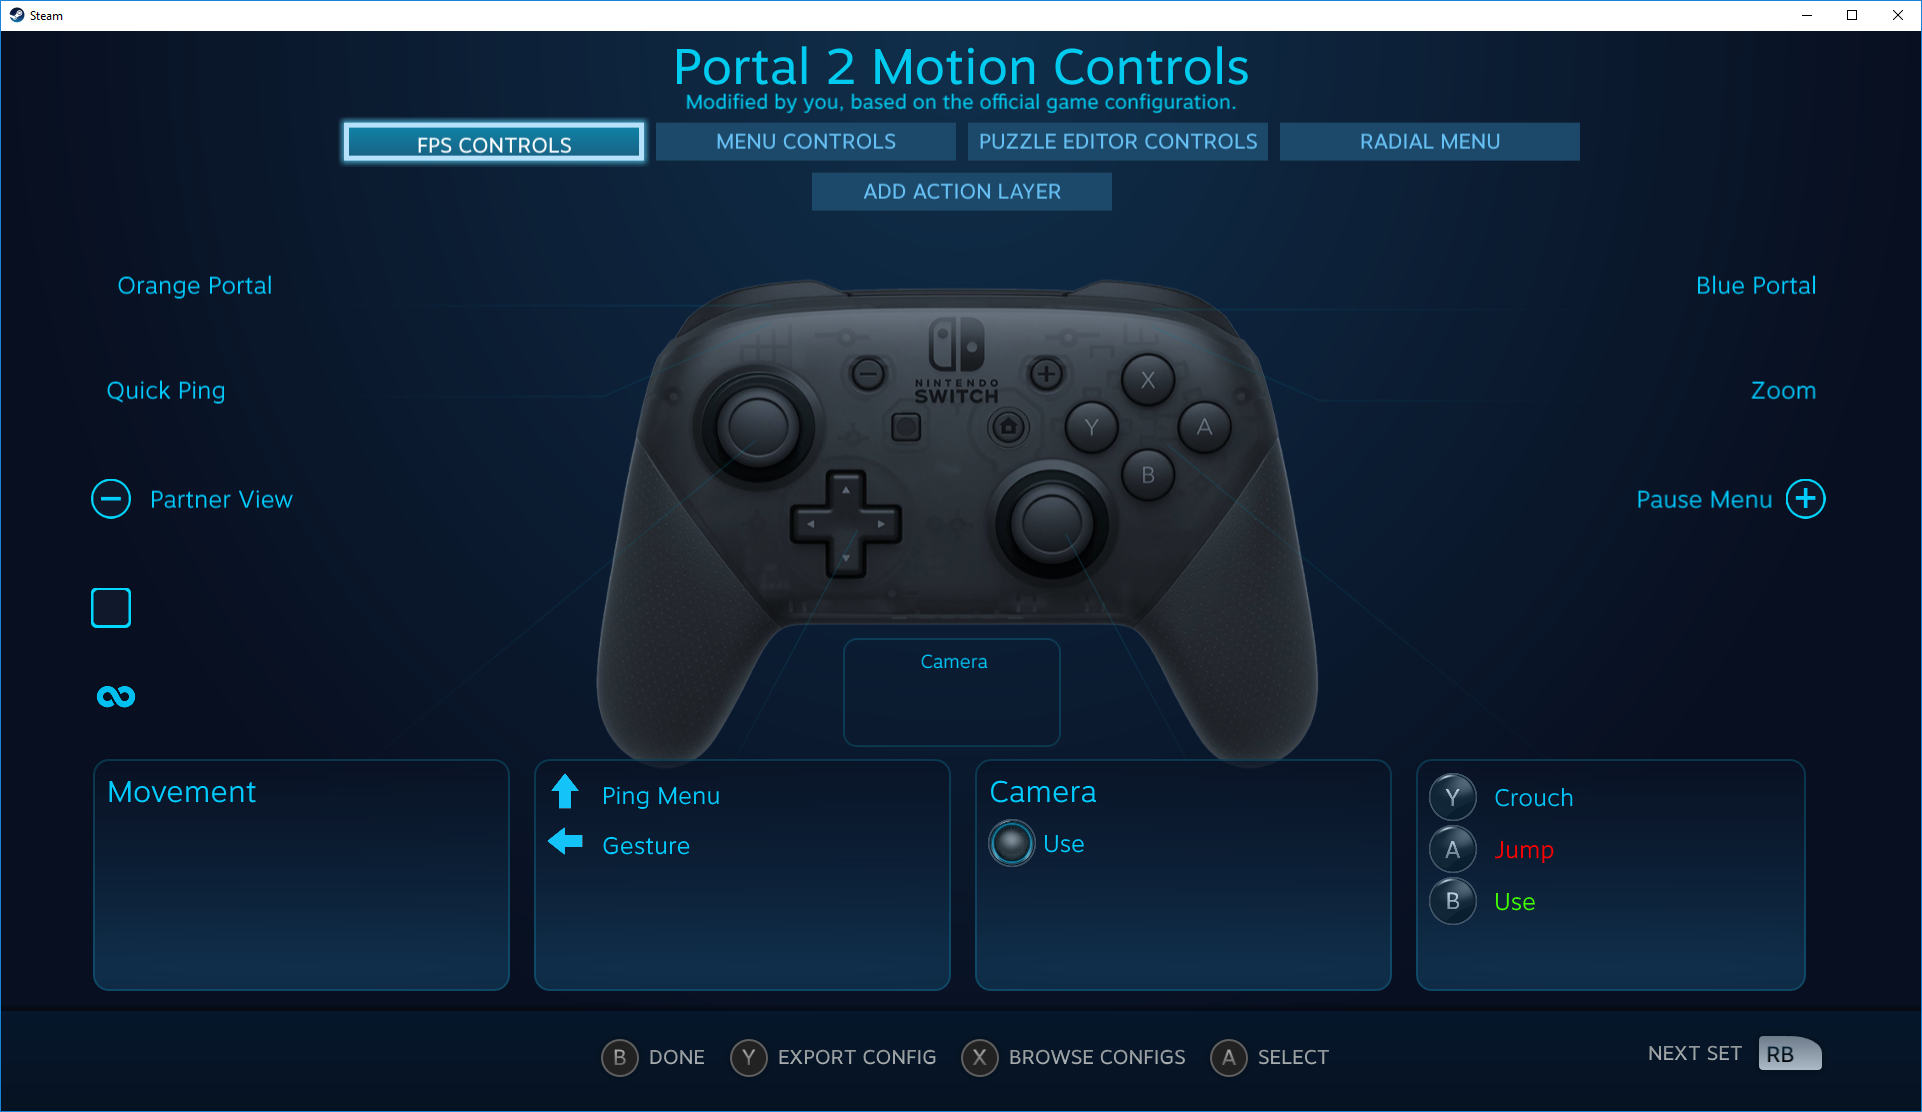
You can also change your controls from game to game by right-clicking on that game in your library, choosing Edit Steam Controller Configuration, and remapping each button.
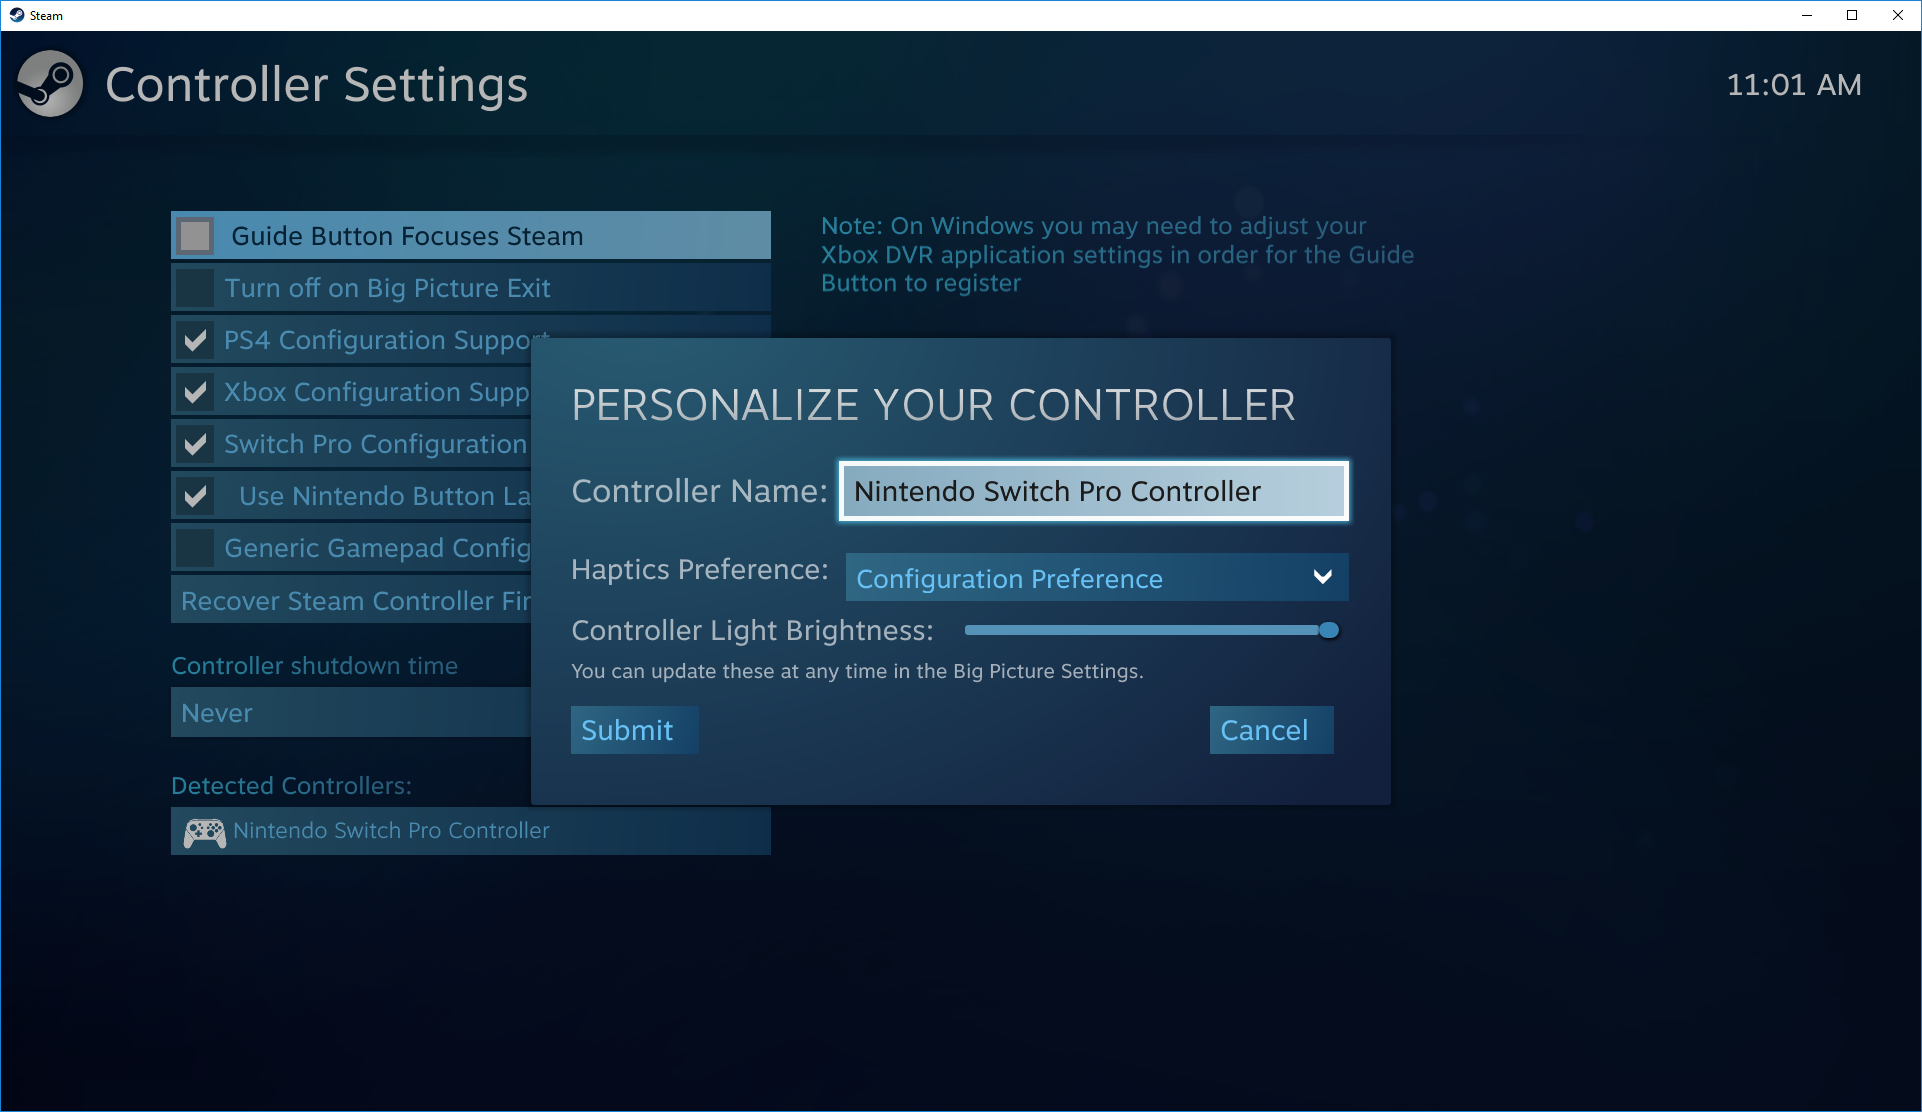
3. While you’re here, take the time to personalize your Switch controller by selecting it under Detected Controllers. If your controller does not register properly, start by clicking Identify, then open the controller preferences. You can change the name, the brightness of the home button’s light ring, and whether to use the gyroscope motion sensor.
4. On the controller settings page, you can also calibrate the gyro sensor and joysticks by clicking Calibrate, but you should only calibrate the controller if you’re experiencing lag issues. If it ain’t broke, don’t fix it. If you ever feel the need to calibrate your controller, click Calibrate, place it on a flat surface, and follow the button’s instructions.
So if everything seems fine, just save your profile and you’re good to go. Whenever you want to use your controller, be sure to turn it on before opening Steam or any Steam game to prevent connection issues.
Switch Pro Controller on PC: Non-Steam Games
Setting up the Switch Pro Controller for non-Steam games
Using Steam is really easy way to start this controller. If you don’t play games via Steam, using a Switch Pro controller is still an option, but it requires a bit of extra work, especially for the Bluetooth connection. But the good news is that it’s natively recognized in modern Windows 10/11, which helps speed things up.
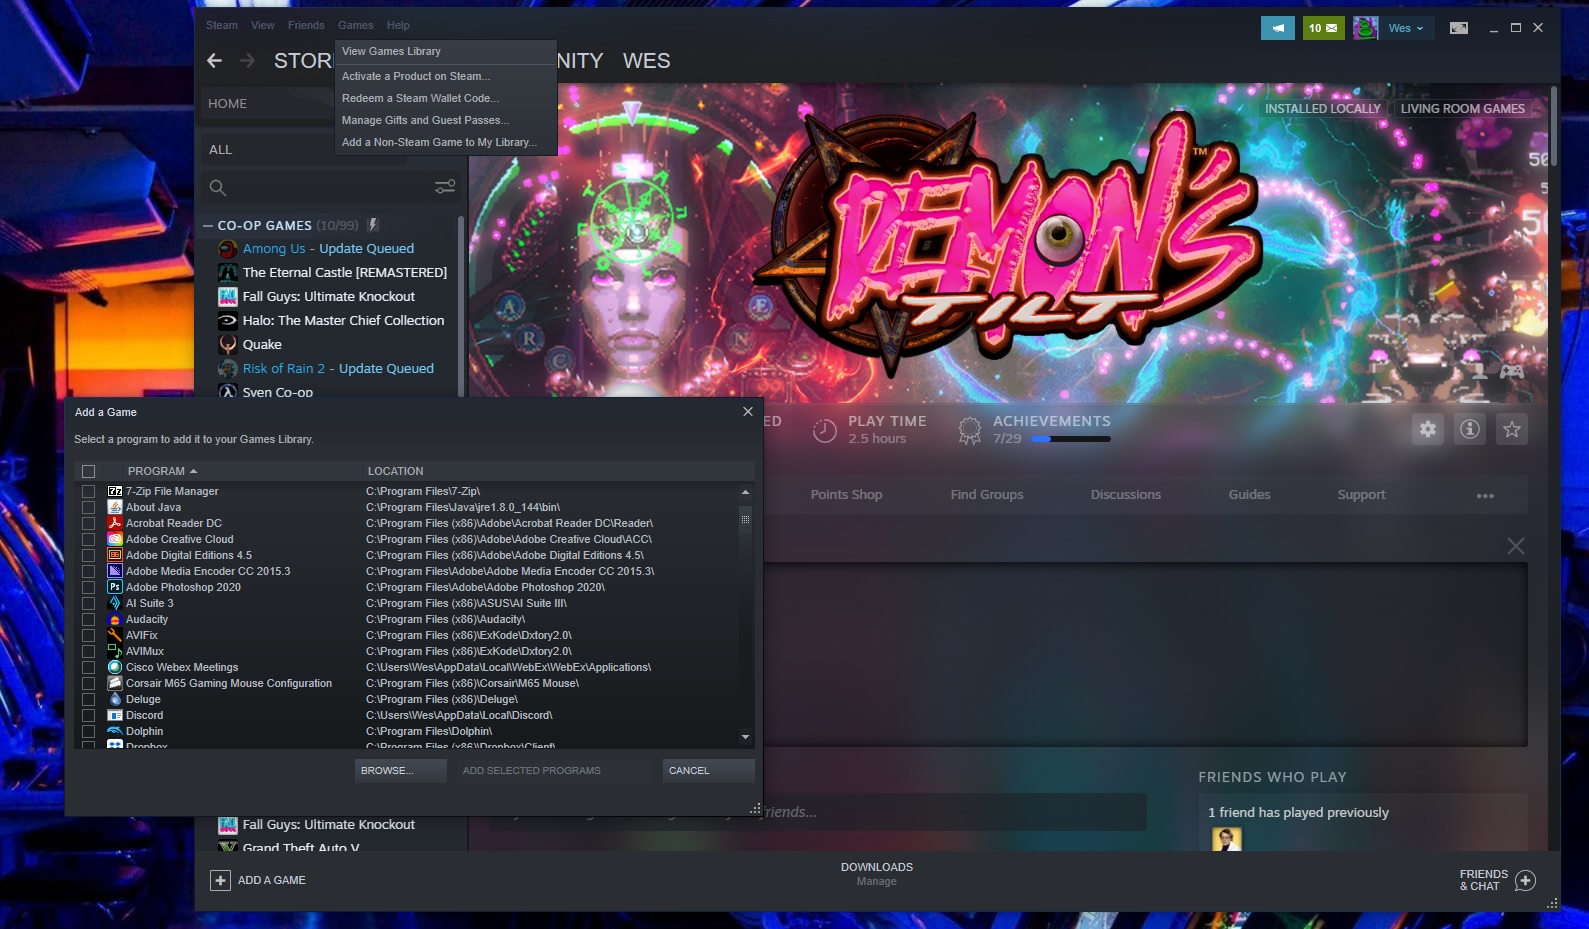
The easiest solution for non-Steam games is to restore Steam to the game. Steam has an “Add to Library” feature for Windows executables that allows you to add other programs to your Steam library and then use the Steam overlay. This even works for the Nintendo GameCube/Wii emulator Dolphin!
As you can see in the image above, click the “Games” menu in Steam, then select the “Add a non-Steam game to my library…” option to display a list of programs on your computer. In most cases, this should allow you to add the game and use a controller with Steam as an intermediary. hooray!
Switch Pro controller on PC: Bluetooth connectivity
How to get Bluetooth working on a computer
Here’s what you need to get started:
Hardware
Software
- BetterJoy (if not using 8Bitdo dongle)
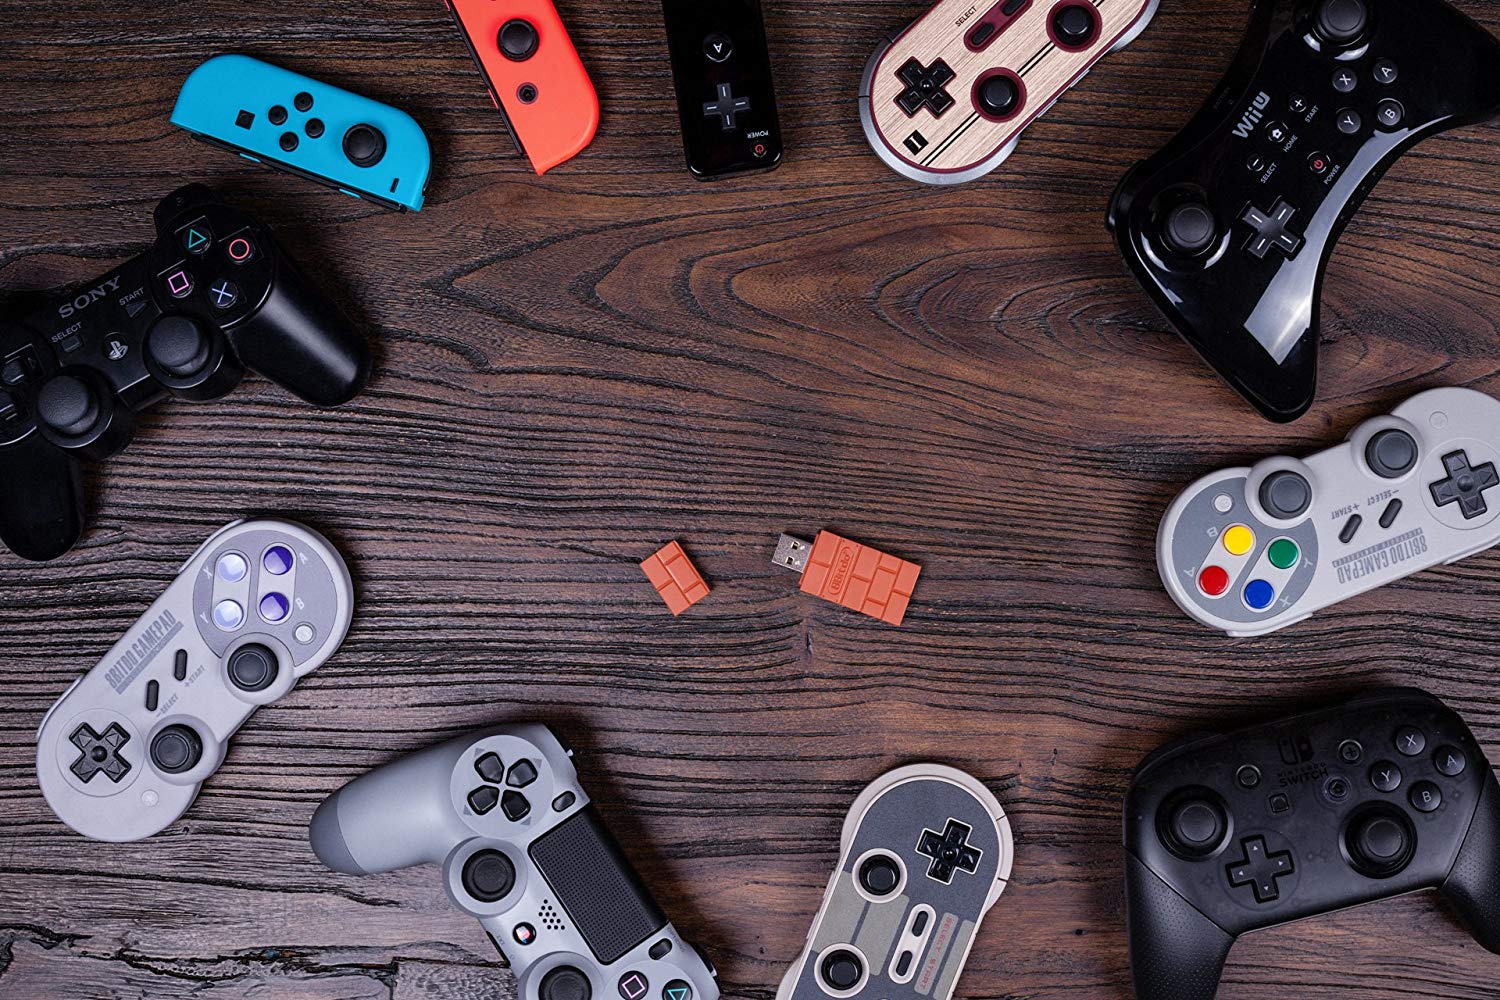
8Bitdo adapter: Simple Bluetooth and XInput support
The $20 8Bitdo Bluetooth Adapter helps you bypass most of the finicky settings below by handling the Bluetooth connection and making Windows play nicely with the controller without any additional software. This will make Windows see the controller as it would an Xbox gamepad, and it supports both button/joystick inputs and motion controls (but not vibration). As a bonus, this will work on multiple consoles and with tons of other controllers, including Switch Joy Cons, PS4 controller, Wii remotes, and more.
If you don’t want to spend $20, follow the guide below.
The (Slightly) Hard Way: Windows Installation Guide
Note: You only need to follow these steps if you are not using the Switch Pro Controller via Steam.
1. Plug your Switch Pro controller into your computer using a USB cable. You should be able to use the USB-A to USB-C cable that came with the controller, or you can use the USB-C to USB-C cable, if your computer has the appropriate port. Within seconds, Windows 10 should appear with a new device connected: the Pro Controller.
You’re most of the way there! But since this is a DirectInput controller (like most gamepads except Xbox ones), if you’re not using Steam’s built-in controller interface, some games won’t recognize the controller without additional software.
2. Download BetterJoy and install it.
BetterJoy is a piece of open source software specifically built to use Switch Pro controllers and joy-cons as generic XInput devices (and to make them easier to use with emulators).
Unzip BetterJoy, open the folder it created when you unzipped it, and go to the drivers folder inside. Install its drivers and reboot as instructed. That’s pretty much the installation process. Now it’s time to connect that controller.
A (slightly) harder way: setting up Windows Bluetooth
You only need to follow these steps if you want to play wirelessly and have decided not to purchase an 8Bitdo Bluetooth adapter.
Note that if you choose to connect via Bluetooth, without using the 8Bitdo adapter method above, you can’t charge the controller while it’s connected, so make sure the battery is charged before you start.
First, disconnect it from the Switch by holding the small circular button on the top of the controller to the left of the USB-C port. (If your Switch is in the same room as your computer, I recommend turning it off, just to keep your Bluetooth environment clean. We also don’t want it to know we’re messing with it bi-directionally. You can just reconnect your Pro controller to your Switch via cable. )
Pull up your Windows Bluetooth settings and start searching for new devices, then press the same little button on the top of the controller again. It should pair automatically after 30 seconds to a minute.
Using the Switch Pro controller in PC games
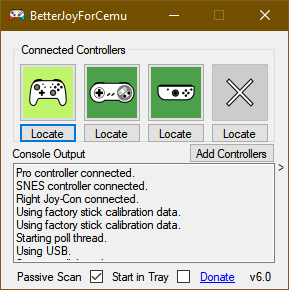
BetterJoy works by reading DirectInput commands as XInput commands, which most modern games support. Now that it’s installed, your Switch Pro controller should behave like an Xbox 360 controller in most games. But first you need to run BetterJoy for Cema (executable file name) from its installation folder.
When it opens, click the “Locate” button and it should find your Switch controller if it’s paired via Bluetooth. Once connected, you can click the map buttons to change as desired.
And with that, you’re ready to play: your controller should appear and work in any game just like an Xbox controller.
Not a controller? Here’s the summary the best gaming keyboardsand the best gaming mouse.